Building an outdoor kitchen doesn’t mean maxing out your credit card. With smart material choices and some elbow grease, you can create a functional outdoor kitchen space that rivals those glossy magazine spreads, without the five-figure price tag. This spring is the perfect time to start an outdoor kitchen project: weather’s warming up, supply chains are stable, and you’ll have the space ready to entertain by summer. Whether you’re dreaming of weekend barbecues or casual poolside drinks, these budget-friendly outdoor kitchen ideas focus on solid construction techniques and practical solutions that’ll actually hold up to weather and use.
Table of Contents
ToggleKey Takeaways
- Budget-friendly outdoor kitchen ideas can be achieved for $150–$400 per station by using pressure-treated lumber, cinder blocks, and sealed plywood instead of expensive granite or built-in cabinetry.
- A DIY pizza oven setup costs $500–$700 in materials and can be built with a repurposed 55-gallon steel drum, firebrick insulation, masonry brick, and concrete—making it an affordable alternative to commercial outdoor ovens.
- Strategic lighting, shade structures like pergolas, and weatherproof material choices transform an outdoor kitchen from a daytime cooking zone into an evening entertaining destination.
- Composite deck materials and stainless steel require zero annual maintenance compared to pressure-treated wood, which needs resealing every 2–3 years, making them worthwhile upfront investments for durability.
- Positioning your outdoor kitchen near existing patios and adding cohesive design details—such as matching trim colors and including a beverage bar—creates an intentional outdoor living space rather than a disjointed utility area.
Simple Grilling Stations for Every Backyard
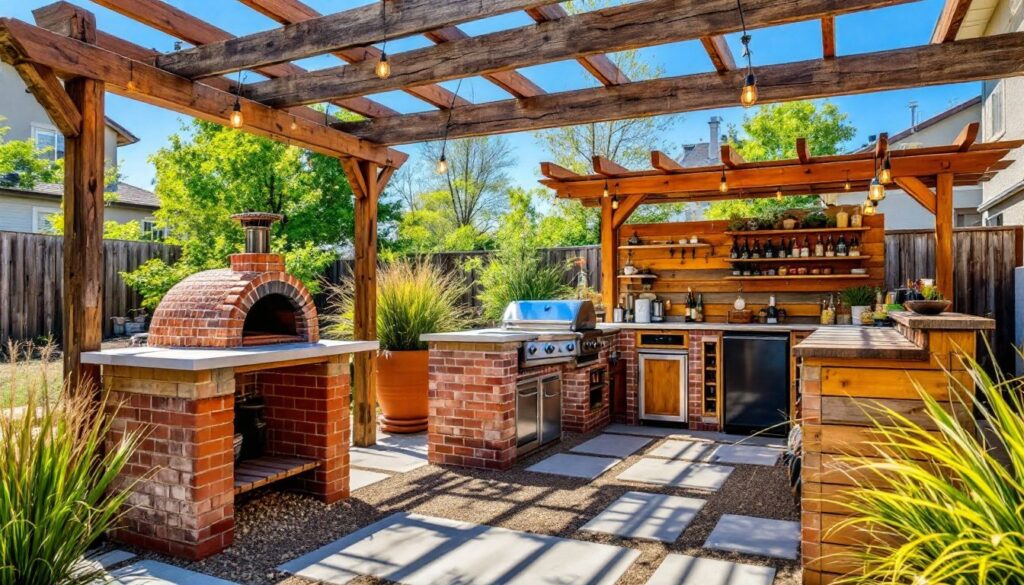
A basic grilling station is the foundation of any outdoor kitchen, and you don’t need expensive built-in cabinetry to pull it off. Start with a sturdy cart-style base or build a simple frame from pressure-treated lumber and cinder blocks. A standard 36-inch grilling station uses four concrete blocks per corner, with pressure-treated 2×10 rim joists bolted on top, this gives you a solid work surface at the right height (around 36 inches for comfortable cooking).
Material costs run roughly $150–$300 depending on wood grade and your grill choice. Skip the high-end granite counters: a sealed plywood top with outdoor sealant holds up fine for food prep. If weight and durability matter, composite deck boards cost more upfront but require zero maintenance. Add a side shelf, another cinder block stack with pressure-treated framing, and you’ve got room for tools, platters, and seasonings. [Backyard Makeover Ideas: Transform] your grilling setup by positioning it near your main patio or deck so you’re not hauling food and supplies across the yard. Make sure the grill sits on a level surface: check with a 2-foot level before anchoring anything down.
Build Your Own Pizza Oven Setup
Essential Tools and Materials
Tools: Angle grinder (for barrel cutting), level (essential for the base), circular saw, shovel, and a pointing trowel for mortar work.
Materials:
• 55-gallon steel drum (repurposed from industrial suppliers, $30–$50)
• Firebrick or mineral wool insulation, 2–3 inches thick ($80–$120)
• Standard masonry brick, about 150–200 pieces ($150–$200)
• Type N mortar mix, about 10 bags ($2–$3 per bag)
• 6-inch stainless steel flue pipe and cap ($120–$150)
• Concrete for pad (mix or ready-pour, $40–$80)
• High-temp sealant for mortar cracks ($20–$30)
Safety first: wear a dust mask, eye protection, and work gloves when cutting the barrel and laying brick. Concrete dust and metal shavings aren’t kind to lungs.
Creating a Beverage and Prep Bar
A beverage station keeps drinks cold and guests happy without them filing through your indoor kitchen every five minutes. The simplest approach uses an old cabinet, a cooler mounted underneath, and a countertop cut to fit. Reclaimed cabinets from estate sales, Habitat ReStore, or Facebook Marketplace run $50–$150 and often cost less than new plywood. Seal the interior with food-grade epoxy or polyurethane, then mount it on a treated wood frame anchored to concrete piers.
For a more durable option, build a frame from pressure-treated 2x4s (studs spaced 16 inches on center) and sheath it with composite siding or sealed plywood, then cap it with a sealed pine or cedar top. A 4-foot-wide bar costs roughly $200–$400 in materials. The real trick is keeping the prep surface shaded, add a pergola overhead (another $150–$300 for basic pressure-treated lumber) or position it under existing shade. Mount stainless steel cup hooks and a wine rack onto the side. Pro tip: a 12V pump and food-grade tubing connected to a cooler below lets you serve chilled beverages straight from the bar without constant refilling. [Indoor Outdoor Living] concepts work well here, keep the bar design visually consistent with your home’s exterior finish so it feels intentional, not tacked-on.
Storage and Counter Solutions
Weather-Resistant Options for Durability
Materials matter when sun, rain, and temperature swings pound on your outdoor kitchen year-round. Pressure-treated lumber resists rot but needs resealing every 2–3 years, budget $1–$2 per linear foot for a quality exterior stain. Composite materials (wood-plastic blends) cost more upfront ($3–$6 per linear foot) but skip the annual maintenance. Galvanized steel frames don’t rust and weigh less than treated wood, though they dent more easily. For countertops, sealed concrete performs well in freeze-thaw cycles, while stainless steel deflects UV and never needs sealing. Avoid plywood exposed to weather, it swells, delaminates, and fails quickly. If budgets are tight, plywood works under a covered structure but fails on open decks. Test your sealants in an inconspicuous spot before committing: some react poorly to certain wood species or regional humidity.
Finishing Touches and Lighting Ideas
Lighting transforms an outdoor kitchen from a daytime asset into an evening hangout. String lights (Edison bulbs on weathered cable) create ambiance for under $100 and are dead simple to install, just run the cable between two posts or trees, tension it with turnbuckles, and plug it into a GFCI-protected outlet. For cooking light, pendant fixtures or spotlights aimed at work surfaces prevent shadow zones where you’re prepping food. LED work lights are cheap now ($15–$40 each) and draw minimal power.
Add a shade structure if you don’t have one, a 12×12 pergola anchored to concrete footings (post holes 30–36 inches deep) costs $300–$500 in materials and keeps the sun and light rain at bay without blocking the view. Finish with high-quality exterior paint on trim and trim-work (two coats of exterior acrylic latex, $50–$80 per gallon). Plants in large pots soften the edges: drought-tolerant ornamental grasses and shrubs need minimal water and don’t attract bugs if you choose carefully. Landscape or pavers between your main structures prevent mud and improve drainage. [Kitchen Inspiration Ideas: Transform] your outdoor space with cohesive finishes, match your deck rail color to nearby trim, or echo your home’s siding tone in your grill surround. A gas fire table or built-in seating nearby encourages folks to linger and enjoy the space, turning your outdoor kitchen from a cooking zone into a true outdoor living destination. Professional contractors often overlook these details, but they’re what separates a backyard utility area from an actual outdoor room.