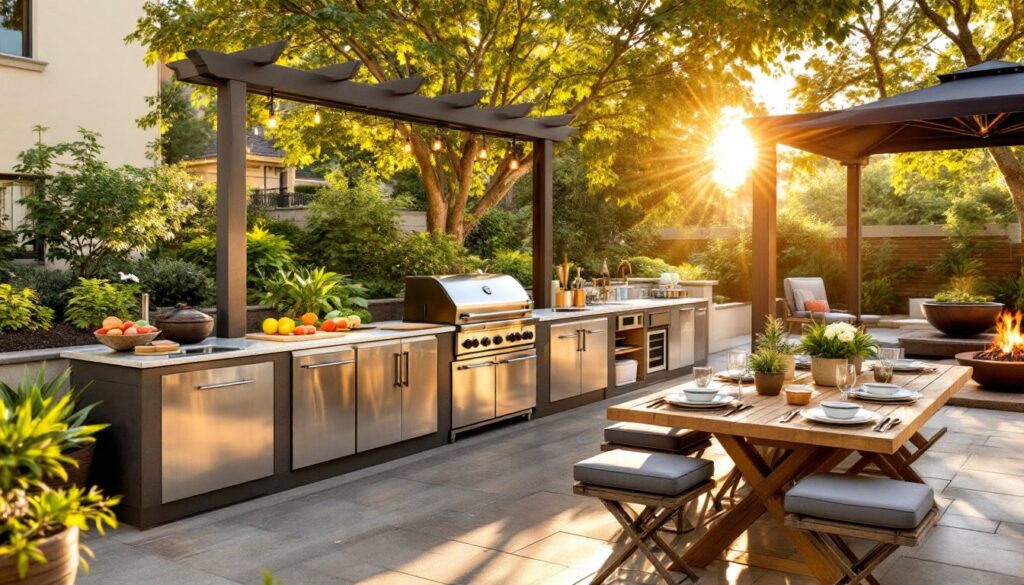
Building an outdoor BBQ kitchen doesn’t have to feel like a contractor’s job, it’s about creating a functional space where you actually want to spend time. Whether you’re flipping burgers for the family or hosting a weekend cookout, a well-designed outdoor kitchen keeps you connected to your guests instead of trapped inside the house. This guide breaks down the essentials: from smart layout planning and equipment selection to clever storage solutions and gathering spaces. You’ll find ideas that work whether you’ve got $2,000 or $20,000 to spend. Let’s build something you’ll use year-round.
Table of Contents
ToggleKey Takeaways
- Successful outdoor BBQ kitchen ideas start with a functional layout that separates prep, cooking, and serving zones while maintaining at least 3 feet of clearance around the grill for safety and code compliance.
- Invest in a quality grill as your centerpiece and durable countertop materials (granite, quartz, or sealed concrete) rather than splurging on trendy features you’ll outgrow.
- Smart storage using weatherproof cabinetry and closed shelving protects equipment from weather damage and keeps your cooking space organized and hygienic.
- Create a comfortable gathering area with seating positioned 8–10 feet from the grill and shade options like pergolas or awnings to extend your entertaining season year-round.
- You can build a functional outdoor BBQ kitchen for $3,000–$5,000 with budget-conscious choices, or invest $15,000–$40,000+ for integrated high-end features that boost resale appeal.
- Prioritize hiring licensed professionals for plumbing, electrical, and permit work to avoid costly underground surprises and ensure code compliance.
Design Your Layout for Maximum Functionality
Plan Your Work Zones and Traffic Flow
The best outdoor kitchens follow the same logic as indoor ones: separate your prep, cooking, and serving areas. Think of it like a kitchen triangle, but outdoors and with more beer involved. You want your grill, cooktop, or smoker as the centerpiece, it’s the main event. Place a prep table or counter to one side (ideally north-facing to minimize sun glare while you’re cutting vegetables), and position your serving station near seating. This setup keeps foot traffic flowing in one direction instead of people weaving around whoever’s flipping steaks.
Measure your space carefully before ordering anything. Most homeowners find a 4-foot minimum counter length on either side of the grill gives you room to work without tripping over guests. Leave at least 3 feet of clearance between your grill and any combustible materials, that’s a code requirement in most jurisdictions, and it’s non-negotiable. If your yard’s on the tight side, a compact L-shaped layout maximizes prep space while keeping the footprint small. Consider how sun moves across your yard at different times of day: a covered area or pergola near the prep zone keeps you comfortable during long cooking sessions.
Essential Cooking Equipment and Appliances
Your grill is the centerpiece, but you’ve got options. Built-in stainless steel grills start around $500 for basic models: they’re durable and integrate cleanly into permanent counters. Portable gas grills run cheaper ($200–$400) and let you reposition gear later if you change your mind. If you’re serious about smoking, a dedicated offset smoker or vertical barrel design gives you low-and-slow heat control that built-in grills struggle to match.
Beyond the grill, think about what you’ll actually cook. A side burner ($150–$300) handles sauces and sides without heating your entire grill. A mini fridge or cooler drawer keeps drinks and prepped ingredients cold within arm’s reach, commercial-grade units run $400–$800 but last decades. An ice maker ($300–$600) turns backyard entertaining into something that feels effortless. Sink and water hookups are game-changers for cleanup: plan for hot and cold lines if you want warm water, and hire a licensed plumber to handle the rough-in work, don’t DIY potable water lines.
Specialty appliances like pizza ovens or rotisseries add pizzazz but require dedicated space and ventilation. A wood-fired pizza oven ($1,500–$5,000 installed) becomes a focal point, though it demands a solid foundation, proper chimney height (usually 10+ feet above surrounding structures), and local permit approval.
Storage and Prep Space Solutions
Weather kills outdoor gear fast, so smart storage isn’t optional, it’s essential. Weatherproof cabinetry or drawers designed specifically for outdoor use (marine-grade plywood, stainless steel hardware) keep your tools and supplies from rotting. Typical stainless steel cabinet systems run $300–$600 per linear foot: plastic outdoor storage boxes are half that and work fine for casual setups. Always choose closed storage over open shelving: dust, pollen, and bugs don’t belong near your cooking surfaces.
Prep space is where most DIYers skimp. A 24–30-inch-deep counter gives you real room to work with cutting boards, mixing bowls, and ingredient staging. Granite or engineered quartz holds up well to weather and sunlight (unlike wood counters, which need sealing constantly). Concrete is budget-friendly ($50–$100 per square foot for materials) and surprisingly durable if sealed properly. Stainless steel is slick and professional-looking but shows fingerprints and can warp if not properly installed over solid framing.
Keep trash and recycling bins within arm’s reach but visually tucked away, use a built-in enclosure or screen it with landscaping. Include a prep sink if possible: even a small vegetable sink and drain simplifies cleanup. Pegboard or wall-mounted hooks keep frequently used tools (tongs, spatulas, instant-read thermometer) organized and visible.
Create a Comfortable Dining and Gathering Area
Your kitchen is only half the equation: the gathering zone is where memories happen. Position seating within conversation distance, roughly 8–10 feet from the grill, so people can chat without shouting over fan noise. A dining table seats your crew, while bar seating at a high counter lets guests perch while you cook. Aim for at least 4 linear feet of counter-height seating for casual entertaining, with proper footrests (12–15 inches below counter height).
Shade transforms a backyard from “briefly tolerable” to “actually enjoyable.” A retractable awning, pergola, or polycarbonate roof over the dining area extends your outdoor season and protects furniture from UV damage. If you go the permanent route (pergola, fixed roof), check local building codes, anything with a roof structure typically requires a permit and may need setback compliance. String lighting or overhead pendants let you host evening gatherings: run power lines through conduit buried at least 12 inches deep (check your local utility markout requirements before digging).
Choose furnishings designed for outdoor use, teak, powder-coated aluminum, or all-weather wicker resist rot and corrosion better than untreated wood or bare metal. Keep a stock of waterproof cushions and store them indoors or in sealed bins during off-season. A fire pit or outdoor fireplace nearby (at least 10 feet from structures to meet most codes) adds warmth and ambiance.
Budget-Friendly vs. High-End Options
You don’t need $50,000 to build a functional outdoor kitchen. A smart DIYer can assemble a solid setup for $3,000–$5,000: a portable grill ($300–$500), a basic built-in counter with storage ($800–$1,200), a small prep table ($200–$400), weatherproof cabinetry ($600–$1,000), and seating ($500–$1,000). Material choice drives cost, concrete counters beat granite by hundreds of dollars per linear foot, and stainless steel cabinetry outlasts cheaper plastic by years. Stick with timeless finishes (black, gray, natural wood) over trendy colors: repainting is cheap if tastes change, but swapping out cabinets isn’t.
High-end builds ($15,000–$40,000+) add custom stonework, built-in refrigeration, multiple cooking surfaces (grill + smoker + side burner + pizza oven), dedicated plumbing with hot water, and integrated seating areas. These kitchens feature designer materials (natural stone, custom cabinetry), professional installation, and permits handled by contractors. The payoff: everything’s integrated, it looks polished, and resale appeal climbs. Mid-range ($5,000–$15,000) is the sweet spot for most homeowners, quality equipment, durable materials, thoughtful layout, and enough customization to feel personal without the six-figure price tag.
Where to splurge: the grill itself (a reliable unit lasts 10+ years) and countertop materials (they show every day). Where to save: storage solutions (upgradeable later), lighting (LED string lights are cheap and replaceable), and seating (outdoor furniture goes on sale constantly). Plan your permitting and utility rough-in work first, surprises underground cost money fast.
Conclusion
An outdoor BBQ kitchen is one of the best returns on a home improvement investment, you’ll use it constantly once it’s built, and it transforms how you entertain. Start with a solid layout that keeps traffic flowing and zones organized. Invest in one really good grill and quality countertops, then build outward from there. Whether you’re working with a shoestring budget or going all-in, focus on durability and functionality first, aesthetics second. Your backyard’s about to become everyone’s favorite place to be.