A split level entryway isn’t just a transition space, it’s your home’s first impression and a design challenge that demands smart planning. The stepped architecture of split level homes creates natural visual breaks, but it also leaves many homeowners scratching their heads about how to make their small split level entryway ideas actually work. The good news? Those same elevation changes offer unique opportunities for layered lighting, strategic storage, and creative visual flow that traditional flat entryways can’t match. Whether you’re working with a modest entry or a tight foyer, these seven design strategies will help you transform that awkward in-between space into a welcoming, functional statement area.
Table of Contents
ToggleKey Takeaways
- Split level entryway ideas leverage vertical space with statement lighting like pendant lights or track lighting positioned strategically to make the space feel larger and more welcoming.
- Bold paint colors such as forest green or charcoal create intimacy in compact entries and should be applied to all four walls in spaces under 100 square feet for a cohesive look.
- Multi-level display walls with floating shelves, consoles, and varied textures transform architectural challenges into functional design features that echo your home’s natural layout.
- Functional landing zones with narrow console tables, built-in bench storage, and strategically-placed hooks at 60-65 inches high maximize storage and usability without sacrificing style.
- Durable flooring materials like vinyl plank or polished concrete, paired with transition strips between levels, create clean visual flow while withstanding the heavy wear entryways experience.
- Layered decor with statement pieces, mirrors, textiles, and personal touches—rotated seasonally—complete the split level entryway by adding warmth and authentic character to the space.
Maximize Vertical Space With Statement Lighting
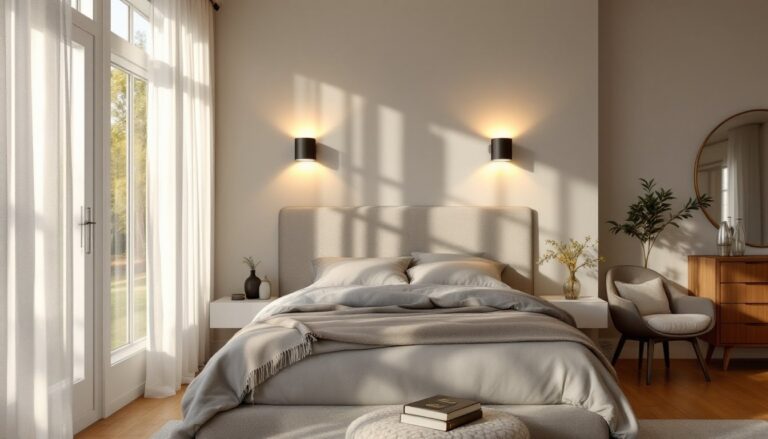
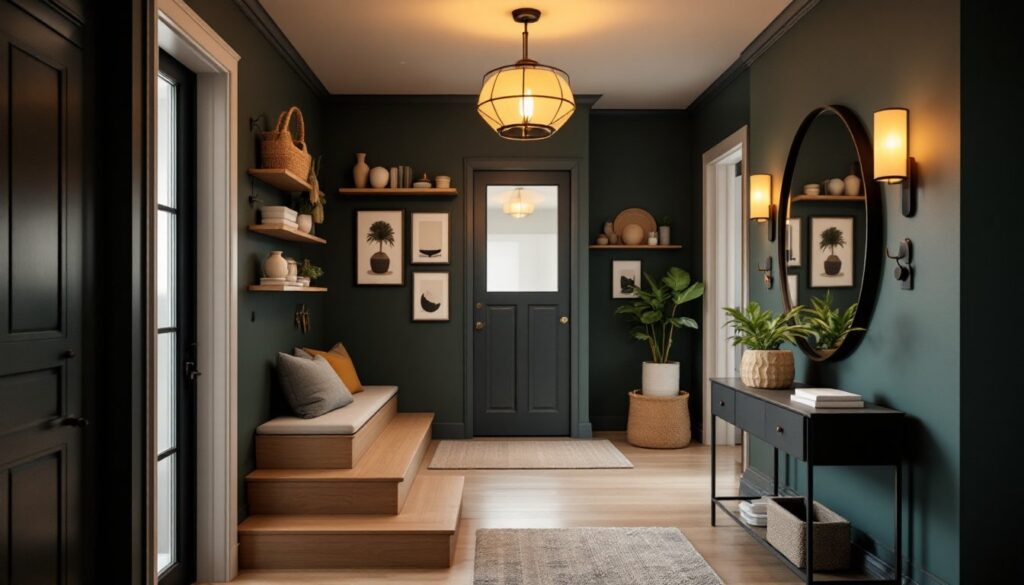
In a split level entryway, vertical real estate is your greatest asset. Most entryways in split level homes sit between floors, which means you’re working with wall height that traditional foyers lack, use it. A pendant light or chandelier hung in that vertical void does two things: it draws the eye upward (making the space feel larger) and provides layered lighting that’s both functional and dramatic.
Consider hanging a 3-inch-diameter pendant 18 inches below the ceiling if you have 9-foot clearance, or drop it lower (24-30 inches) for cozier 8-foot ceilings. Track lighting works equally well and gives you flexibility to spotlight artwork or highlight the architectural lines of your staircase. If your electrical circuit doesn’t currently support overhead lighting, that’s a manageable addition, you’ll likely need to run a new 14-gauge or 12-gauge wire from a nearby breaker, which is straightforward for anyone comfortable in an electrical panel (though local codes may require a licensed electrician for the connection).
Recessed lights are tempting but often create harsh shadows in entryways. Instead, pair overhead ambient lighting with a wall-mounted sconce flanking a mirror (about 60-65 inches from the floor, which is standard eye level). This combination eliminates shadows, adds depth, and serves double duty if you’re using the space to check appearance before heading out.
Create Visual Interest With Bold Color and Texture
Paint is the cheapest way to transform any entryway. For split level entries, avoid pale neutrals that wash out the space: instead, commit to a confident color that makes the room feel intentional. Deep forest greens, warm charcoal, or even a muted terracotta work beautifully in compact spaces because they create intimacy rather than feeling cramped.
Apply color to all four walls, not just an accent wall, if your entry is under 100 square feet. This creates a cohesive room rather than a fragmented one. Use a quality eggshell or satin finish primer-and-paint combo (one product simplifies the process) and expect one gallon to cover roughly 350-400 square feet with two coats: most small entryways need just one gallon. Allow the paint to cure fully (48-72 hours) before hanging art or touching walls.
Design a Multi-Level Display Wall
Your split level’s step creates a natural opportunity for a gallery wall or statement shelving. Mount floating shelves on the upper level (12-16 inches apart vertically) and a narrow console or ledge on the lower level to create visual rhythm that echoes your home’s architecture. Use heavy-duty shelf brackets rated for 50+ pounds if you’re displaying books or decorative objects: wall anchors alone won’t cut it, you need those brackets securing into wall studs, spaced 16 inches apart (standard framing).
Layer textures here: woven baskets, ceramic vessels, framed prints, and natural materials like wood or stone. The texture absorbs light and sound, making the entryway feel warmer and less echo-y. Avoid symmetry: stagger objects at different heights to play into the split level’s inherent asymmetry rather than fighting it.
Build a Functional Landing Zone
An entryway without storage becomes a clutter collector. In a split level home, you’re often short on square footage, so every piece must earn its place. A narrow console table (18-24 inches deep) on the lower level or a slim cabinet on the upper level provides a landing zone for keys, mail, and daily items. If you have the depth, a shallow built-in bench with under-seat storage (18 inches tall, 30-36 inches wide) solves the dual problem of seating while you tie shoes and hidden storage below.
Building a bench-and-storage unit isn’t difficult if you have basic carpentry skills. Frame it with 2×4 lumber for the base and sides, add a 1×12 or 1×10 for the seat (depending on depth), and install a simple piano hinge on the back edge so the seat lifts to access the cavity below. Paint or stain to match your décor. The whole project takes a weekend and costs $150-250 in materials.
Above that landing zone, add hooks at 60-65 inches high for jackets and bags. Use 3/8-inch toggle bolts if you’re hanging into drywall between studs, rated for 25+ pounds each. Space hooks 12 inches apart horizontally so they don’t crowd the entryway visually. This basic utility setup makes the space functional while maintaining that intentional design feel.
Enhance Flow With Flooring and Transitions
Flooring changes are where split level entryways either shine or feel disjointed. If your entry straddles two different floor levels, use flooring materials intentionally rather than letting mismatched pieces collide. A 3-4 inch wide transition strip or threshold marks the shift cleanly and protects edges from wear. If you’re installing new flooring, lay the same material across both levels, or choose a second material that complements the first (light oak with dark tile, for example).
For a DIY approach, install vinyl plank flooring, it’s waterproof, durable, forgiving to install, and costs $2-5 per square foot. Click-lock planks require no adhesive and can be installed in a weekend with just a miter saw and a tapping block. If both levels will have the same material, take time to acclimate the boxes for 48 hours in the room’s temperature and humidity before installation. Neglecting acclimation is the leading cause of cupping and expansion problems.
Consider the practical reality: entryways take a beating. Use durable, easy-to-clean materials. Polished concrete, sealed stone, or quality vinyl plank all work. Avoid light-colored grout in tile: go dark or use epoxy grout instead, which resists staining. A small area rug (3×5 feet or smaller in tight entries) placed at the main entry point adds warmth, defines the space, and catches moisture and dirt before it travels into the home.
Add Warmth and Personality With Decor Layers
Small split level entryway ideas come alive when you layer decor intentionally. Start with one or two statement pieces, a large mirror, an oversized framed print, or a sculptural object, then build around it with smaller supporting items. A mirror opposite a light source bounces light and expands perceived space: hang it at 60 inches from the floor to the center so it catches your reflection at eye level.
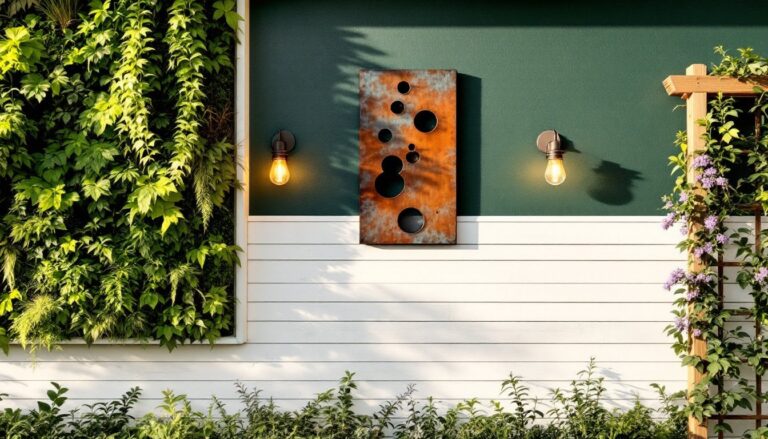
Textiles add immediate warmth. A woven wall hanging or macramé piece introduces texture and breaks up hard architectural lines. Bring in living elements carefully: a low-light tolerant plant like a pothos or snake plant on a shelf or pedestal works if your entry has north-facing or indirect light. Live plants require watering schedules: dried pampas grass or eucalyptus in a tall vase offer the same aesthetic without maintenance.
Finally, address seasonal changes. A small wooden ladder leaning against the wall can hold seasonal throws or displays: rotate décor quarterly to keep the space feeling fresh. Personal touches matter most, family photos in consistent frames, a vintage piece from a local antique shop, or artwork from someone you know. The goal is a space that feels genuinely yours, not styled from a catalog. That authenticity is what transforms a functional entryway into a memorable first impression. ImproveNet and other interior design resources like Home Bunch offer inspiration galleries when you’re stuck, and community forums discussing split entry décor can spark ideas from homeowners in similar situations.
Conclusion
Your split level entryway isn’t a constraint, it’s an opportunity. With intentional lighting, bold color, smart storage, durable flooring, and layered décor, you’ll create an entry that feels both functional and welcoming. Start with one or two improvements, let the space breathe, and build from there. The best entryways reflect the people living in the home, so choose choices that genuinely serve you, not just Pinterest perfection.