
An outdoor TV wall transforms a backyard into an entertainment hub, no more bringing devices in and out, no more squinting at a laptop screen. Whether you’re hosting game nights or weekend gatherings, the right TV wall setup makes outdoor living feel like a natural extension of your home. The challenge isn’t finding a TV that works outside: it’s designing a wall that stands up to weather, looks intentional, and integrates power and viewing angles without looking bolted-on. This guide walks through seven proven outdoor TV wall ideas that combine durability with real style, from weatherproof enclosures to integrated greenery. Each approach addresses the practical demands of exterior installations, moisture, heat cycling, sun exposure, and the need to hide cables, while keeping the focus on functionality and aesthetics. Ready to turn your patio into the neighborhood’s favorite hangout spot.
Table of Contents
ToggleKey Takeaways
- Weatherproof TV enclosures protect outdoor displays from humidity, temperature swings, and UV exposure while costing $800–$3,000 depending on size, making them the simplest setup option.
- Proper ventilation and cable management—running conduit instead of bare cables—are invisible details that determine whether an outdoor TV wall looks polished and lasts a decade.
- Outdoor TV wall ideas range from built-in stone or brick accents ($4,000–$8,000) to modern slatted wood designs and greenery integration, each suited to different climates and skill levels.
- A dedicated 20-amp electrical circuit with a weatherproof GFCI outlet ($300–$600) is non-negotiable for safety and code compliance, requiring a licensed electrician in most jurisdictions.
- Leave at least 8–12 inches of air gap behind the TV for ventilation, install moisture barriers and weep holes for drainage in masonry builds, and reapply exterior finishes every 2–3 years in humid climates.
Weatherproof TV Enclosures for Durability
A weatherproof TV enclosure is the simplest way to protect an outdoor display without making major structural changes. These units house the television in a sealed, vented cabinet designed to manage humidity, temperature swings, and UV exposure, the three enemies of electronics.
Standard outdoor TV enclosures come in aluminum or powder-coated steel frames with vented or louvered panels that allow air circulation while blocking direct rain. Brands like SunBriteTV and Peerless-AV make enclosures rated for full-sun and salt-spray environments: these cost between $800 and $3,000 depending on screen size. Measure your TV’s actual width and height (not the diagonal measurement sold at retail, a 55″ TV is roughly 49″ wide by 28″ tall), then choose an enclosure with at least 2 to 3 inches of clearance on each side for airflow and cable routing.
Installation requires mounting the enclosure to a wall stud or post using ⅜-inch lag bolts spaced 16 inches apart vertically. A studfinder and a cordless drill make quick work of this: a masonry bit is necessary if you’re bolting to stucco, brick, or concrete. Run power and HDMI cables through conduit tubing at the back of the enclosure, never snake bare cables through open air where UV and moisture will degrade them. Enclosures also simplify cooling: the vented design prevents heat buildup that can shorten a TV’s lifespan by years.
This option works best when you need a no-fuss, code-compliant installation that doesn’t require framing or masonry work.
Built-In Stone or Brick Accent Walls
A mortared stone or brick TV wall adds permanence and visual weight, it says you’ve invested in the space. This is where outdoor TV design crosses into structural work, so plan on hiring a mason if you’re not already skilled at laying brick or stone. A stone feature wall typically runs $4,000 to $8,000 in materials and labor, depending on wall size and stone type.
Design the wall to frame the TV, not fight it. A 12-inch to 18-inch-wide surround of natural stone in earth tones (slate, limestone, or reclaimed brick) creates a focal point without overwhelming the screen. Leave a minimum 12-inch air gap between the back of the TV and the stone for ventilation and cable management. Run conduit for power and HDMI before the mason sets the final course: retrofitting cables through finished masonry is miserable.
Stone walls also radiate and absorb heat differently than wood or siding, which helps protect electronics from thermal stress. Ensure proper drainage behind the wall by installing a moisture barrier (4-mil polyethylene or a breathable house wrap) and weep holes every 24 inches along the base to shed water. This prevents freeze-thaw cycles from cracking mortar or shifting stone over time, critical if you live in a cold climate.
Consider covered outdoor living space ideas to shield the wall from direct rain exposure, which extends the life of mortar joints and reduces algae growth on the stone.
Modern Slatted Wood Wall Designs
Horizontal or vertical wood slats create a clean, contemporary frame for an outdoor TV while diffusing sound and hiding cables in the gaps. Build a slat wall with 2×6 or 2×8 pressure-treated lumber fastened to a 2×6 rim joist anchored to wall studs every 16 inches. Space slats ¼ to ½ inch apart to account for wood movement (it expands in humidity and shrinks when dry): too tight and the wall will cup or warp.
Choose a finish that handles UV and moisture. Exterior deck stain (not interior wood stain) or exterior paint rated for wet environments works best: avoid solid-color stains that hide underlying rot. Reapply every 2–3 years in humid climates. Alternatively, composite slats (plastic-wood hybrids like Trex or Timbertech) are virtually maintenance-free and don’t splinter, though they cost 30% more upfront.
Route the TV’s power cable and HDMI through ¾-inch PVC conduit installed vertically behind the slats during framing. This keeps cables protected and hidden. Leave an 8-inch clearance behind the slat frame for airflow around the TV enclosure. If you’re not comfortable with stud-framing, hire a contractor to build and install the slat wall: a professional carpenter can knock out a 6-foot-wide slat wall in a day.
This design pairs beautifully with comfortable seating, pair it with an outdoor living room setup for a cohesive entertainment zone.
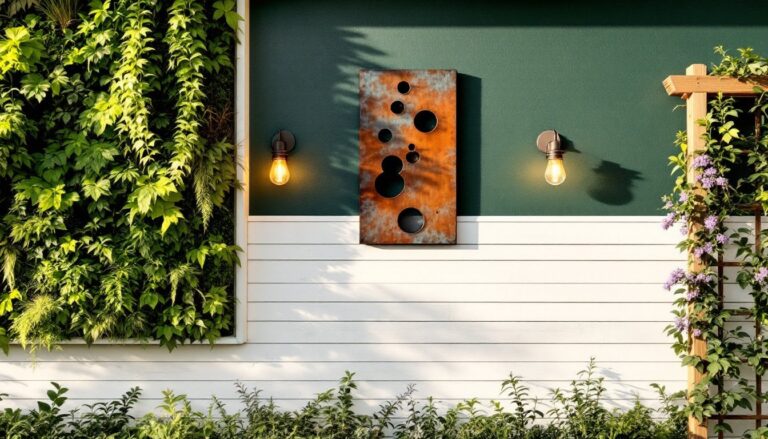
Garden Trellis and Greenery Integration
Soften a TV wall with living plants. A wooden trellis frame around the TV creates layers and breaks up the hard lines of the screen while climbing vines or trained ivy add organic texture. This works best in mild, humid climates where plants thrive: in arid regions, the maintenance burden is heavier.
Build or purchase a lattice or post-and-rail trellis in cedar or composite material, sized to extend 24 to 36 inches on each side of the TV. Secure it to the same wall studs as the TV mount so it bears its own weight (a mature climbing vine can weigh 50+ pounds when wet). Train ivy, clematis, or climbing fig to grow along the trellis: trim it back every month during the growing season so vines don’t creep in front of the screen or trap heat against the wall.
Plant perennial climbers (not annual vines that die back each winter) in raised planters at the base of the trellis. Use premium potting soil amended with perlite for drainage, standing water against the wall invites rot and mold. A drip irrigation system on a timer keeps plants hydrated without manual daily watering: this is especially important in summer heat when container plants dry out quickly.
Greenery also improves acoustics: thick foliage absorbs sound reflections and softens audio from outdoor speakers. Coordinate with hardscape elements, pair the trellis wall with stone pavers or gravel at ground level and outdoor bar ideas for a fully integrated entertainment area.
Lighting and Power Solutions for Function and Ambiance
Proper lighting and power infrastructure make or break an outdoor TV wall. You need reliable electricity for the TV, sound system, and ambiance lighting, and all of it must be safe, weather-sealed, and code-compliant.
Run a dedicated 20-amp circuit from your main electrical panel to the TV wall location using underground conduit or conduit in the attic (surface-mounted conduit looks rough). Install a weatherproof outlet box at the wall, minimum 4 feet above grade (ground level) to keep it out of standing water: use a GFCI outlet that cuts power if it detects a ground fault. If you’re not licensed in your state, hire a licensed electrician for the panel work and final connection: most jurisdictions require a permit and inspection. The cost is $300–$600 for an electrician to run a new circuit and outlet, but it’s non-negotiable for safety.
For ambiance, install LED strip lighting (warm white, 2700K color temperature) above or below the TV to reduce eye strain during evening viewing. LED strips draw minimal power and last 25,000+ hours: mount them in aluminum channels with frosted diffusers to prevent glare directly into viewers’ eyes. Control these with a wireless remote or smart switch so you can dim them without walking back to a wall panel.
Hide cables with split conduit or cable covers, never leave HDMI or audio cables draped in open air. UV exposure degrades shielding, and visible cables make even a professional install look half-finished. Recent innovations in smart home technology make wireless streaming increasingly practical, but hardwired HDMI and power remain the gold standard for reliability in outdoor settings. For cable runs longer than 25 feet, use active HDMI cables (powered repeaters) to prevent signal loss.
Conclusion
The best outdoor TV wall design balances protection, function, and aesthetics, and every project must start with honest assessment of your climate, skill level, and time commitment. Weatherproof enclosures offer simplicity, while masonry and wood designs deliver lasting style. Whatever direction you choose, don’t cut corners on power, drainage, ventilation, or cable management: these invisible details determine whether your wall looks polished and lasts a decade, or looks sloppy and fails in two seasons. Build once, build right, and enjoy your backyard entertainment space for years to come.