A well-designed outdoor kitchen transforms your backyard into a genuine extension of your home, a place where family gatherings, entertaining friends, and everyday cooking all happen under the open sky. Modern outdoor kitchen ideas have evolved beyond the basic grill-on-a concrete-pad setup. Today’s designs blend functionality, durability, and style, creating spaces that are as enjoyable to use as they are to look at. Whether you’re starting from scratch or upgrading an existing setup, understanding the current trends in layout, materials, and appliances helps you build something that actually works for your lifestyle and budget.
Table of Contents
ToggleKey Takeaways
- Modern outdoor kitchen ideas prioritize open-concept layouts that position the grill facing guests and create a natural gathering hub between your home and seating area.
- Invest in a quality 36-inch built-in grill ($800–$2,000) as your anchor appliance, and pair it with stainless steel construction and flare-up management for durability and performance.
- Sintered stone countertops outperform natural stone because they require less maintenance, resist staining and thermal shock better, and deliver an upscale look that lasts.
- Strategic lighting (20 footcandles on cooking surfaces, softer ambient lighting around seating) and a covered pergola transform your outdoor kitchen into a functional, year-round entertaining space.
- Start with essentials (grill, frame, concrete countertop), then phase in refrigeration, storage, and upgrades like side burners and lighting as budget allows, saving 20–30% through DIY prep work.
- Install refrigeration and weatherproof storage near your prep zone early, then enhance comfort and ambiance gradually with seating, backsplash, and seasonal purchases during fall and winter sales.
Open-Concept Layouts: Maximizing Flow and Entertainment
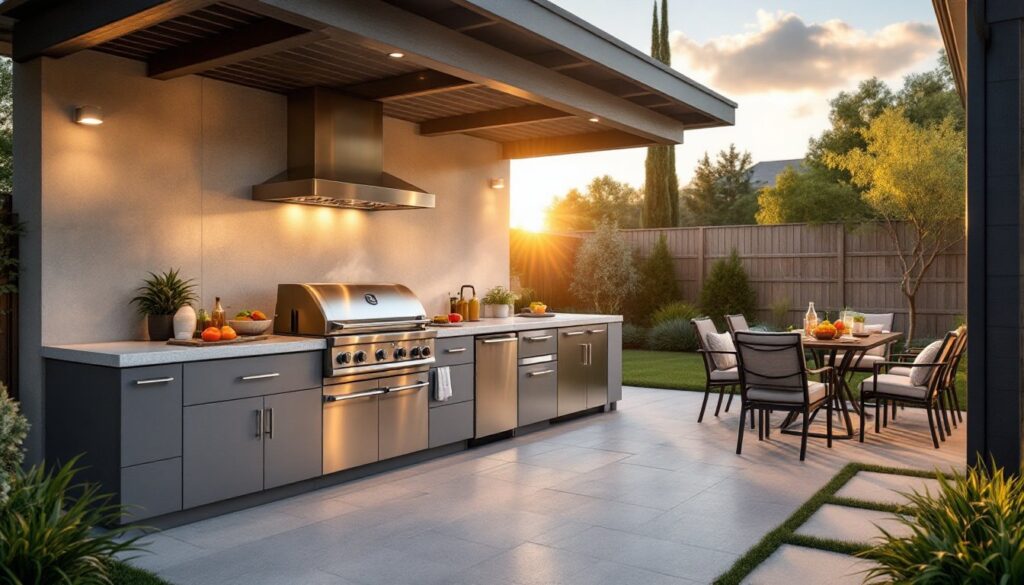
Modern outdoor kitchens ditch the isolated island setup in favor of open-concept designs that encourage movement and conversation. The key is positioning your cooking zone so you’re facing the seating area rather than turning your back to guests. A typical layout flows from grill to prep space to serving counter in a logical sequence, roughly a triangle formation, similar to interior kitchen design.
Consider the sightlines from your house and patio. You want to see both the grill and your guests comfortably. Positioning the kitchen between your home and the seating area works well: it becomes the natural gathering hub. Ample counter space, think 24 to 36 inches of working surface beside the grill, lets you prep without squeezing. Many homeowners are also adding a beverage station or bar ledge, which keeps traffic flowing and takes pressure off your main prep zone.
Size matters here. A compact outdoor kitchen might be 8 feet long: a more generous setup stretches 12 to 16 feet. Think about your actual entertaining style. If you host casual weeknight dinners for four, oversizing wastes money and yard space. If weekend parties are your thing, the extra real estate pays off. Designs featured in design features professionals recommend often emphasize this balance between ambition and practicality.
Shadow patterns matter too. Test the sun’s position at the time of day you cook most often. Cooking in full afternoon sun without shade turns the grill area into an oven, and not in a good way. A pergola, shade sail, or overhead structure solves this without blocking the view.
Essential Appliances for Every Outdoor Cook
Built-In Grills and Cooktops
The grill is your anchor. Built-in models come in three main types: propane, natural gas, and charcoal. Propane is portable and doesn’t require a line: natural gas ties to your home’s existing supply and costs less per BTU over time. Charcoal offers flavor and ritual, but demands more hands-on management.
Grill size is measured in cooking surface area (square inches of grate). A 36-inch grill typically offers 500 to 600 square inches. Burner count varies: more burners mean better heat control, but 3 to 4 burners handle most home cooking. Look for stainless steel grates and firebox, they resist rust and last longer than painted steel. Flare-up management is essential: models with removable drip trays and good drainage prevent grease buildup and unwanted flame spikes.
Many modern setups add a side burner or range-top cooktop for sauces, sides, or simmering. This doubles your cooking capacity and opens up menu options beyond grilling. Infrared burners heat faster and more evenly, but cost more upfront. Standard burners are reliable and cheaper to repair or replace.
Refrigeration and Storage Solutions
Outdoor refrigeration keeps beverages cold and ingredients fresh without constant trips indoors. Undercounter fridge drawers fit under counter space and maintain a 34 to 38°F range. Full-height fridges (like outdoor-rated apartment-style units) offer more capacity but take up floor space. Stainless steel construction is standard because it resists corrosion and UV damage: but, coastal or humid climates demand even tougher marine-grade options.
Storage cabinets should be weatherproof, sealed or elevated to shed water, not trap it. Wood cabinets require marine-grade sealant renewed annually: stainless steel needs minimal upkeep. Drawers with soft-close hardware prevent slamming in wind. A covered cabinet section for tools, utensils, and seasonal items keeps clutter off the counter and extends tool life. Plan for at least one lower cabinet space for trash and recycling so you’re not hauling bags across the yard.
Smart Materials and Durability Trends
Outdoor kitchens live in harsh conditions, sun, moisture, temperature swings, and sometimes salt air. Material choice makes or breaks longevity.
Countertops see the most action. Granite and marble are beautiful but demand sealing annually and can crack under thermal shock (moving hot pans directly onto cool stone). Sintered stone (engineered quartz fused at high temperature) handles weather better and resists etching and staining. Concrete offers a modern look, takes custom finishes, but can spall and stain if not sealed. Stainless steel is durable and professional-feeling but gets hot in direct sun and shows fingerprints. For durability in 2026, sintered stone edges out natural stone because it requires less maintenance while looking equally upscale.
Structural frames are often stainless steel or aluminum. Stainless resists corrosion longer and looks polished: aluminum is lighter and cheaper but requires more frequent touch-up paint. Wood cabinets underneath must be pressure-treated or composite decking material to resist rot. Avoid untreated pine or fir, they’ll fail in two to three seasons outdoors.
Backsplashes and tile work add visual interest. Porcelain tiles outperform ceramic because they’re denser, less porous, and handle freeze-thaw cycles better. Matte finishes hide water spots better than glossy. Grout should be epoxy-based (not cement-based) to resist moisture and staining. Outdoor design resources like Remodelista’s approach emphasizes quality materials that age gracefully rather than trendy finishes that fade quickly.
Sealants and fasteners are often overlooked but critical. Stainless steel or hot-dipped galvanized hardware won’t rust. Exterior-rated polyurethane sealants (not caulk) handle expansion and contraction. Check local building codes, some jurisdictions require fire-rated materials if the kitchen is close to the house.
Creating Ambiance With Lighting and Seating
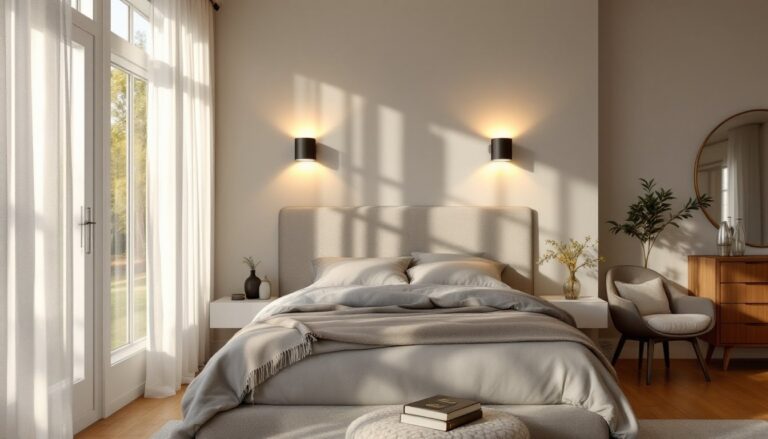
Lighting transforms an outdoor kitchen from a daytime-only space into an evening destination. Overhead lighting, string lights, pendant fixtures, or recessed LEDs under a pergola, needs to illuminate the grill and prep area without creating glare on your face or casting shadows on the work surface. A general rule: aim for 20 footcandles (roughly 200 lumens) on the cooking surface, and softer ambient lighting (10 to 15 footcandles) around the seating area.
LED lights last longer and use 75% less energy than incandescent bulbs. Solar-powered accent lights are cheap and require no wiring, but deliver less consistent brightness. For a professional feel, in-ground or deck-step lighting defines edges and creates a polished look. Dimmer controls let you shift from task lighting during prep to mood lighting during dinner.
Seating design works best when it’s 3 to 6 feet from the kitchen zone, close enough to converse with the cook, far enough to stay out of the heat and grease platter. Bench seating paired with a high-top table works for casual gatherings. Lounge chairs plus side tables suit relaxed entertaining. Weatherproof cushions in outdoor fabric (solution-dyed polyester, acrylic) resist mildew and fading better than regular cloth. Avoid untreated wood benches unless you seal them annually.
A covered outdoor living room setup extends your entertaining season and provides shelter from unexpected rain or intense afternoon sun. Adding a pergola or retractable shade system transforms your kitchen and seating into a year-round space without the cost of a full room addition.
Budget-Friendly Ways to Start Your Outdoor Kitchen
You don’t need to drop $15,000 to create a functional outdoor kitchen. Smart phasing lets you build over time without regret.
Start with the grill. A quality 36-inch propane grill (stainless steel, built-in model) runs $800 to $2,000. This is your workhorse: don’t cheap out here. Pair it with a simple stainless steel frame or built-in cabinet surround ($1,000 to $2,500 depending on materials and finishes). Concrete countertop slabs cost $15 to $30 per square foot installed, affordable and functional, even if not fancy.
Add refrigeration and storage next. An undercounter fridge ($600 to $1,200) and one weather-resistant cabinet ($400 to $800) expand your cooking reach without very costly. Shelving mounted on the exterior of the cabinet gives you working space without a big footprint.
Phase in extras gradually. Lighting, a side burner, tile backsplash, lounge seating, these improve the experience but aren’t required for a working kitchen. Install them when budget allows. Many homeowners also find that backyard makeover strategies help prioritize projects that deliver the most value first.
DIY what you can: site prep, demolition, painting, and simple installation work save 20 to 30% of labor costs. Leave gas line hookups, electrical work, and structural modifications to licensed professionals, these aren’t places to cut corners. Permits vary by jurisdiction but often run $100 to $500. Factor them in upfront: unpermitted work can create resale headaches and fail inspection if you ever sell.
Shop for sales seasonally. Spring and early summer are peak outdoor living season, prices are higher and inventory is picked over. Fall and winter bring better deals and less crowded material yards. You also avoid rushing a design you’re not fully happy with.